How to Change Apple ID Country & Region?
-64fb0358a77942ab998f05b4e1332e91.png?x-oss-process=image/resize,m_fill,h_257,w_460/format,webp)
Many users look to change their Apple ID region for different reasons, for example, to access apps available only in specific regions, enjoy exclusive content, or benefit from local deals. Whatever the reason, understanding how to change your Apple ID region is crucial. This guide provides step-by-step instructions, highlights key considerations, and addresses common challenges you may encounter during the process.
Part 1: How to Change Apple ID Region
Regardless of the device you’re using, the process of changing your Apple ID region is generally similar, with only slight differences. Below are detailed instructions for different devices.
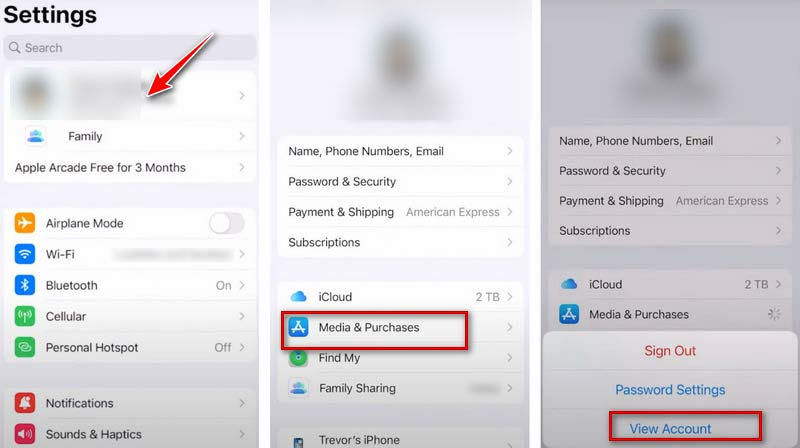
1.1 Change Your Apple ID Region/Country on iPhone or iPad
Open Settings: Find the "Settings" app on your home page and tap to open it.
Access“Media & Purchase”: At the top of the Settings menu, select your Apple ID (your name). Tap on the "Media & Purchases" option.
View Account: Click “View Account” and enter your Apple ID password if prompted.
Choose New“Country/Region”: select the "Country/Region" option. Browse the list and choose your desired country or region.
Agree to Terms and Conditions: Review and accept Apple’s terms and conditions.
Update Payment Information: Choose “None” as the payment method, and enter a billing address for the selected region. Some regions may require a specific payment method.

1.2 Change Your Apple ID Region/Country on Mac or Windows PC
Launch the Program: Launch the Apple Music app or Apple TV app.
Access Account Settings:
· On Mac: Select “Account” > “Account Settings” from the menu bar.
· On Windows: Click your name at the bottom of the sidebar and select “View My Account.”
Sign In: Enter your Apple ID credentials for verification and click “Sign In.”
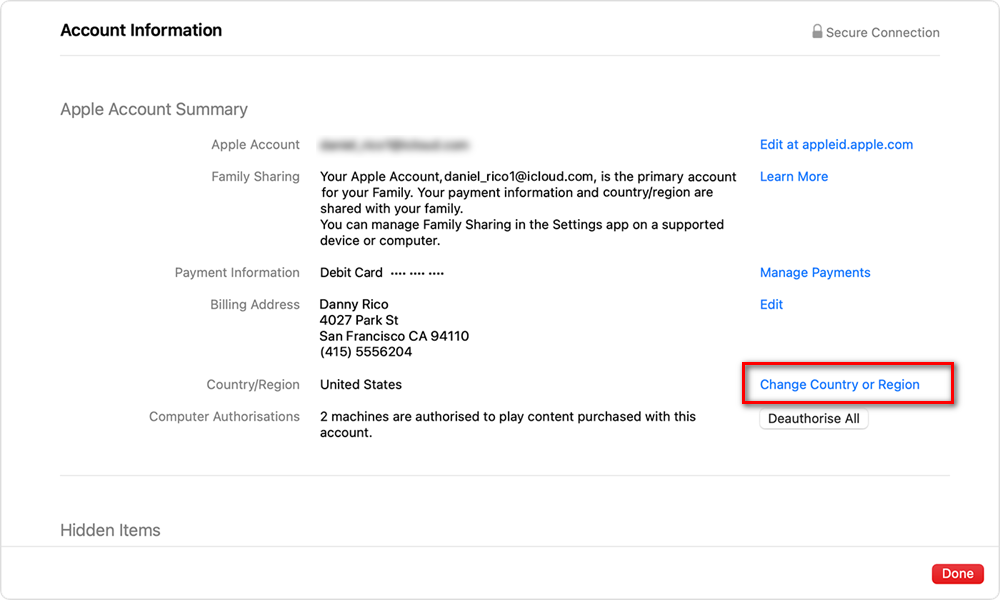
Change Country/Region: On the "Account Information" page, locate the "Country/Region" section and click “Change Country or Region.”
Select a New Region and Agree to Terms: Choose your new country or region, review the terms, and click “Agree.”
Update Payment and Billing Information: Enter your new payment method and billing address, then click “Continue.”

1.3 Change Your Apple ID Region/Country Online
Visit the Website: Go to the official website of Apple Account on your browser.
Sign In: Log in with your Apple ID and password.
Select Personal Information: Once logged in, click on the “Personal Information” or similar option.
Change Country/Region: Locate the "Country/Region" section and click “Change Country or Region.”
Select a New Region: Choose your desired country or region from the list.
Update Payment Method and Contact Information: Follow the prompts to enter the payment details and contact information for the new region.
Part 2: Important Notes on Changing Your Apple ID Region
The steps above can help you easily switch your Apple ID from your current region to another, but there are a few things to keep in mind, as the process may involve risks like data loss.
1. Preparations Before Switching
Clear Account Balance: Make sure your Apple ID has no remaining balance.
Cancel Subscriptions: Terminate all active subscriptions and wait for them to expire.
Resolve Pending Transactions: Complete any outstanding memberships, pre-orders, rentals, or refunds before proceeding.
2. Back Up Your Device
Before making any changes, create a complete local backup of all your devices, including your iPhone, iPad, iPod touch, and Mac. For data synced through iCloud, such as Photos or Messages, download full-sized copies and turn off iCloud syncing.
3. Manage Apps and Subscriptions
App Store Availability: Apps available in one region's App Store might not be accessible in another. You may need to re-download certain apps.
Re-purchase Paid Apps: If app prices vary between regions, you may need to repurchase apps you’ve already bought.
Part 3: Buying Apple IDs for Other Regions
Since Apple's policies and services are subject to change, the steps for switching regions may need to be updated based on the latest Apple support guidelines. If you’re unable to change your region or are worried about potential data loss but still need an Apple ID for a different region, purchasing one directly can be a viable option.
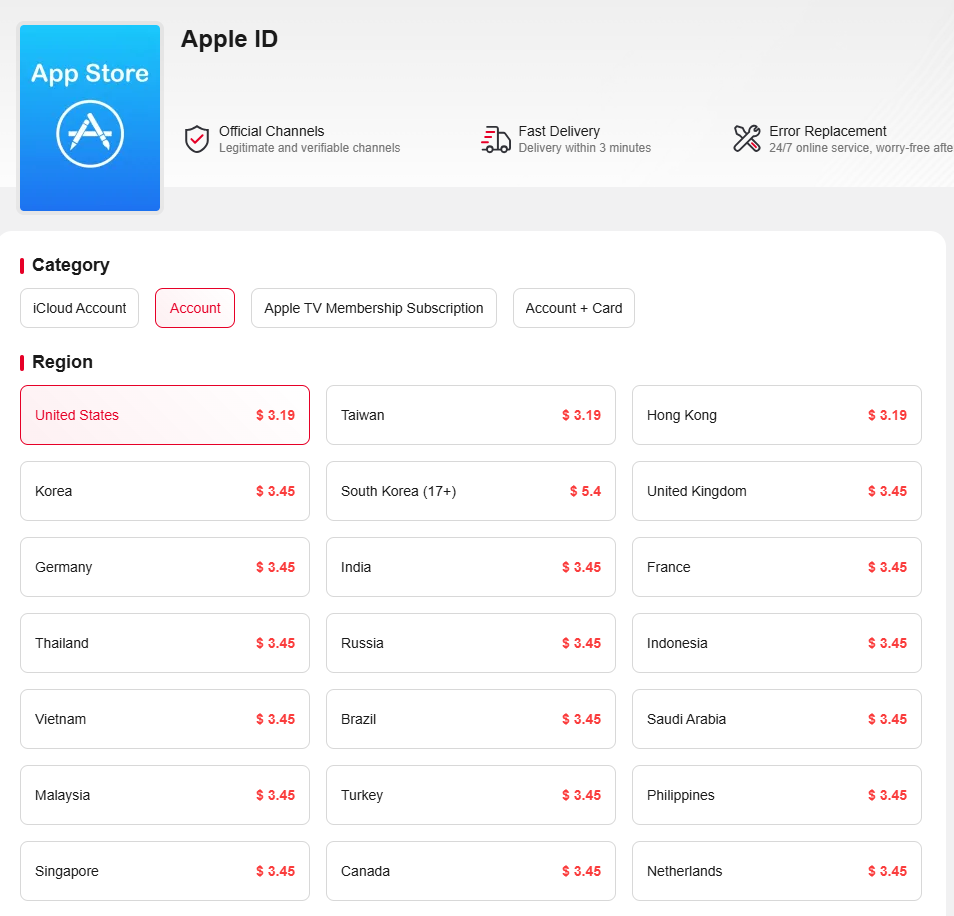
Accountboy offers safe and reliable services for buying region-specific Apple IDs. These accounts are clean and unlinked from phone numbers and email addresses, ensuring security. After payment, account details are delivered within 24 hours, along with a three-day replacement guarantee for quality issues.
Part 4: FAQs About Changing Your Apple ID Region
1. Why I Cannot Change My Apple ID Region?
Common reasons include:
Remaining account balance
Active subscriptions that haven’t been canceled
Region change restrictions (e.g., frequent changes in a short time)
Account security issues
Ensure all balances are zero, cancel subscriptions, and check your account’s security settings. You may need to contact Apple Support for further assistance.
2. Can You Change Your Apple ID Region Back?
Yes, you can change your Apple ID region back to your original region or any other supported region following the same steps outlined in the original text. There's no inherent limitation on switching directions.
3. How Many Times Can I Change My Apple ID Region?
Apple doesn't officially specify a limit on how many times you can change your region. However, it's generally recommended to avoid frequent changes (within a short timeframe) as it might raise security flags with their system.
Conclusion
Changing your Apple ID region is a straightforward process when you follow the steps and precautions outlined in this guide. If you encounter any issues, consult Apple’s official support pages for additional help or buy an Apple Account from Accountboy.


 (2)-e2a4ced8c026473dbc58e685c46b0f3f.jpg?x-oss-process=image/resize,m_fill,h_160,w_120/format,webp)


